
Updated November 5, 2023
So we’ve covered your safety and we’ve covered the basics. Let’s push on to the mother of all lifts: The Back Squat.
The back squat is one of the most fundamental strength training exercises and a staple in workout routines for good reason. When performed correctly, back squats are very effective for building power and muscle in your lower body and core.
This comprehensive guide will teach you everything you need to know to master the back squat. You’ll learn about proper form, common mistakes to avoid, variations to try, how to safely add weight and progress, and alternatives if back squats don’t work for you.
Master Proper Back Squat Form and Technique
The key to maximizing the benefits of back squats and avoiding injury is using proper form. Here are the steps to perform a back squat with perfect technique:
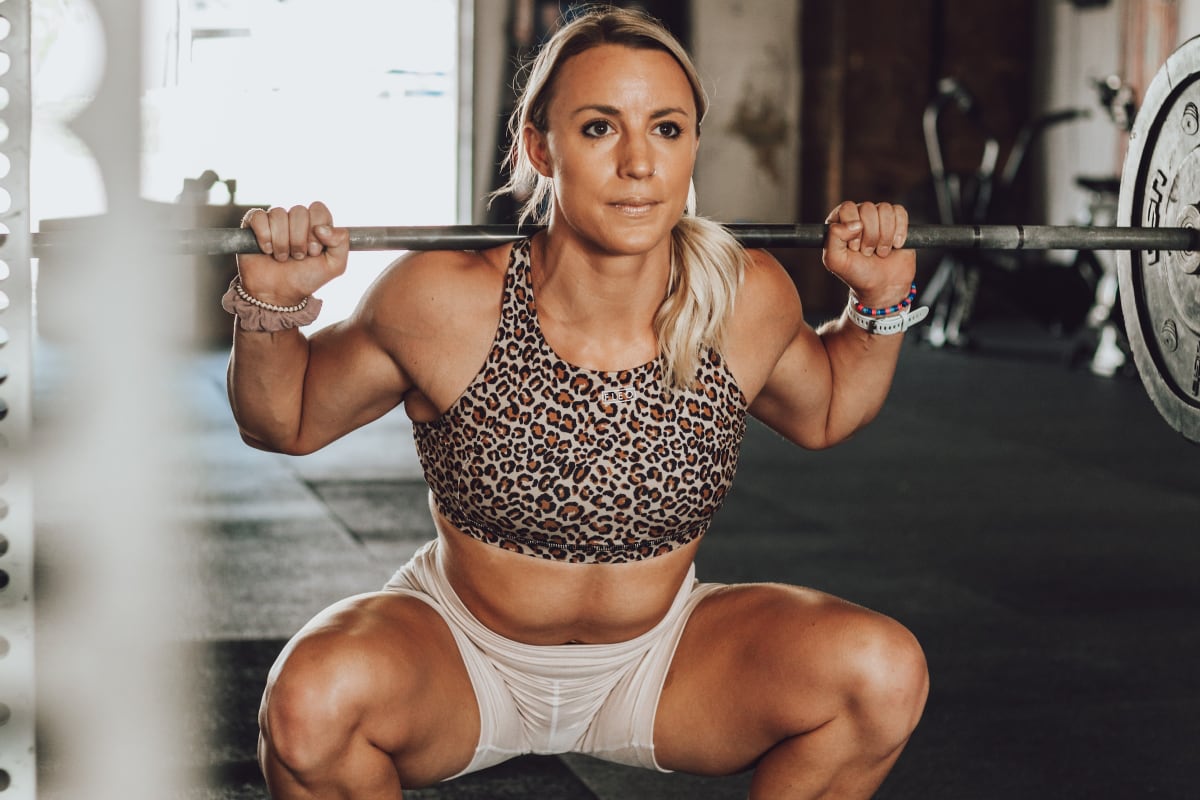
- Stand with feet shoulder-width apart and hold a barbell across the upper back. Place the bar in a comfortable position across your trapezius muscles. Keep your core engaged throughout the lift.
- Bend your knees and hips and lower your body until your thighs are parallel to the floor (or lower). Make sure your back remains straight, and avoid rounding your lower back. Push your knees out as you squat down and keep your weight on your heels.
- Push back up to the starting position by extending your hips and knees. Squeeze your glutes and quad muscles at the top of the movement. That completes one rep.
- Maintain a neutral spine and avoid leaning forward. Your torso should remain upright and your lower back straight. Do not let the bar roll forward. If you have mobility issues, elevate your heels on weight plates or wear weightlifting shoes with a raised heel.
- Keep the bar balanced and stable across your back. If the bar feels uneven or unstable, carefully re-rack the weight and adjust before continuing. Engage your core muscles to support your back.
Start with a lighter weight and higher reps, around 2 to 3 sets of 10 to 15 reps. Focus on form before progressing to heavier weights. Back squats require practice and patience to master.
Benefits of Back Squats
When performed correctly, back squats provide numerous benefits. Here are some of the main advantages of incorporating back squats into your workout routine:
- Builds lower body and core strength. Back squats are one of the most effective exercises for strengthening your quadriceps, hamstrings, glutes, and core muscles. Strong legs and a solid core translate to improved performance in sports and everyday activities.
- Improves balance and coordination. The back squat requires control, balance, and coordination to perform correctly. Over time, your neuromuscular connections and proprioception will improve, which enhances performance in other exercises and sports.
- Can boost athletic performance. Stronger, more powerful legs can improve speed, acceleration, and vertical jump height. This makes back squats ideal for athletes looking to gain a competitive edge.
- May reduce injury risk. Strong, flexible legs and a stable core help support your body during dynamic movements and high-impact activities. This can help decrease the chance of muscle strains, ligament sprains, and joint injuries in the lower body.
- Provides metabolic benefits. Back squats require a lot of energy and activate a high percentage of muscle fibers. This can boost your metabolism and increase calorie burning, which aids fat loss and weight management.
The benefits of back squats are numerous when you commit to proper form and consistent practice. Be patient and start light, focusing on precision and control. Over time, you will build strength, improve mobility, and unlock your power potential.
Targets Major Muscle Groups
Back squats work multiple major muscle groups in your lower body and core, including:
- Quadriceps: The quadriceps are the large muscles on the front of your thighs. Back squats target the quadriceps through an extensive range of motion, helping to strengthen and tone your legs.
- Hamstrings: Your hamstrings are the muscles on the back of your thighs. Back squats work the hamstrings as you lower into and rise out of the squat.
- Glutes: The glutes or gluteal muscles are your butt muscles. Back squats heavily target the glutes, especially at the bottom of the movement.
- Core muscles: Your core muscles include your abs and lower back. Back squats require bracing and stabilization from your core muscles to support your body during the exercise.
- Calves: The calves refer to your gastrocnemius and soleus muscles. Back squats target the calves as a secondary muscle group since they stabilize your feet and ankles.
Back squats provide an efficient way to work all these major muscle groups in a single exercise. Over time, back squats can help increase muscle hypertrophy, strength, and endurance in your legs and core for improved power and performance.
Provides Full Body Benefits
While back squats primarily target your lower body and core, they also provide benefits for your entire body:
- Improves flexibility and range of motion. Back squats require and enhance flexibility in your hips, knees, and ankles. Over time, you can increase your squat depth and mobility, which translates to better flexibility and movement in your daily life and other exercises.
- Boosts power and explosiveness. As you build strength in your legs and core, you can increase power by lifting heavier weights and performing squat variations like jump squats or squat pulses. This helps improve fast-twitch muscle fibers and explosiveness.
- Burns calories and aids fat loss. Back squats are a high-intensity exercise that burns a significant amount of calories, both during and after your workout. By building muscle and increasing your metabolism, back squats can help boost fat burning and support weight loss or maintenance.
- Improves posture and body awareness. Back squats strengthen your core and legs, which are essential for good posture and alignment. They also enhance mind-muscle connection and proprioception, helping you maintain better form and positioning in all areas of life.
- Builds bone density. The weight-bearing nature of back squats helps stimulate bone formation and increase bone mineral density. This is especially important as you age to prevent conditions like osteoporosis.
While the primary benefits of back squats are building powerful legs and a strong core, they also provide whole-body benefits when performed consistently with good form.
Back squats are a fundamental movement that translates well to improved strength, flexibility, balance, and performance in all areas of fitness and athletics.
Common Mistakes to Avoid
While back squats are a safe and effective exercise when done correctly, it is easy to make mistakes that reduce effectiveness or increase injury risk. Be aware of the common back squat errors and how to avoid them:
- Not going deep enough
- Rounding your back
- Letting knees cave in
- Not keeping weight on your heels
- Bouncing at the bottom
- Adding weight too quickly
The key to safe and effective back squats is starting light, focusing on precision, and avoiding common mistakes. Go at your own pace, listen to your body, and stop if anything feels painful. Master the basics before progressing to heavier weights. With regular practice, good form will become second nature.
Variations to Try
Once you have mastered the basic back squat, you can try different variations to keep challenging yourself. Here are some squat variations to incorporate into your routine:
- Pause squats: Hold the bottom position of the squat for 2 to 3 seconds to increase time under tension. This enhances muscle activation and strength in the bottom range of motion. Use a lighter weight when first starting pause squats.
- Front squats: Hold a barbell in front of your shoulders instead of behind your head. This forces your core to work harder for stability and balance. Front squats also place slightly more emphasis on your quadriceps.
- Jump squats (bodyweight): As you rise out of the squat, push off forcefully with your legs to jump up before landing softly in a squat position. This plyometric version improves power and explosiveness.
- Overhead squats: Hold a barbell overhead with arms extended. This challenging variation requires full-body control, balance, mobility, and strength. Only attempt overhead squats if you have experience with standard back squats and can keep a neutral spine throughout the range of motion.
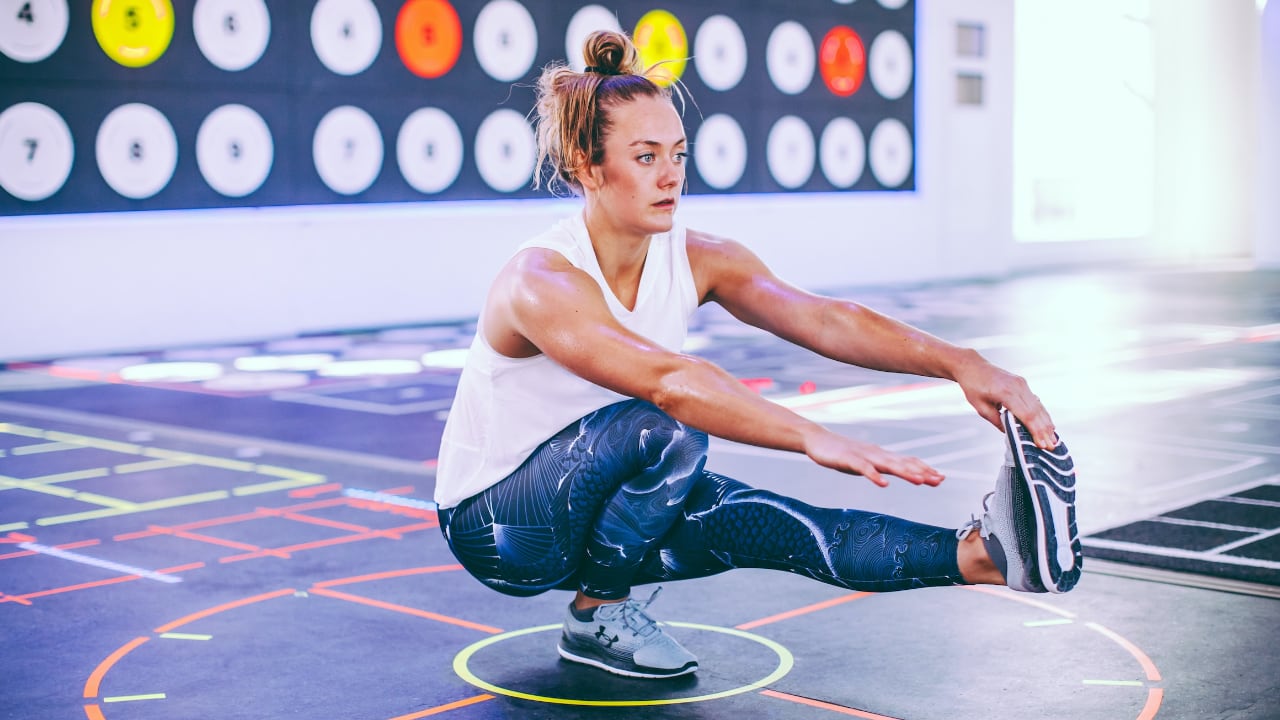
- Single-leg squats(pistol squats): Perform squats standing on one leg at a time. This requires a high degree of balance, stability, and control.
Squat variations are a great way to continue progressing after you have mastered the basic back squat. Start with one variation at a time and continue focusing on proper form and technique. Variations provide an efficient way to keep challenging your muscles and avoid plateaus.
Adding Weight Progression
Once you have mastered the bodyweight back squat with perfect form, you can progressively add weight to continue gaining strength. Here are some tips for safely progressing to weighted back squats:
- Start with dumbbells or kettlebells. Hold a dumbbell or kettlebell at shoulder level, or do goblet squats with a kettlebell at chest level. This allows you to squat with added weight while still focusing on form. Start with a weight you can control for 8 to 12 reps.
- Move to barbell back squats. When you are comfortable with the dumbbell or kettlebell squats, you can transition to a barbell placed across your upper back. Start with an empty 45-pound bar and gradually add weight in 5 to 10-pound increments.
- Increase weight in small amounts. Only add a little weight at a time. Increase the weight by no more than 10% each time. This allows your muscles, joints, and connective tissue to adapt safely to progressively heavier loads.
- Stay in the target rep range. For the best results, aim for 3 to 4 sets of 6 to 12 reps. Drop to 6 to 8 reps as the weight gets heavier. Do not sacrifice form for more weight or reps.
- Consider using spotter arms or a power rack. Once the weight gets very heavy, use spotter arms, safety bars, or a power rack for added safety. This allows you to push yourself without fear of getting stuck at the bottom of a rep.
- Increase weight and decrease volume over time. As your strength improves, add weight and drop to 3 to 4 sets of 4 to 6 reps. This helps continue progressing while avoiding burnout. Unless you’re going for a MAX lift, don’t drop below 4 working reps, as it will reduce the metabolic benefits of the exercise.
- Deload when needed. If your form starts to suffer or you plateau in your progression, take a week to deload. Decrease the weight and reps by about 50% for a week. This allows your body to recover so you can continue progressing after the deload week.
The key to safe progression is listening to your body, checking your ego, and avoiding the temptation to add too much weight too quickly.
Focus on precision and control, not the amount of weight on the bar. With consistent practice, patience, and deloads when needed, you will build up strength over the long run.
In conclusion, the back squat is one of the most fundamental and effective exercises you can do to build powerful legs and a strong core. When performed properly with good form, back squats provide numerous benefits for strength, muscle, balance, flexibility, and athletic performance.
With practice and patience, you can master the back squat and reap the benefits of this powerful exercise. Muscular, sculpted legs and a solid core will serve you well for sports, fitness, and everyday life. Unlock your strength potential and perfect your form with the ultimate guide to back squats.